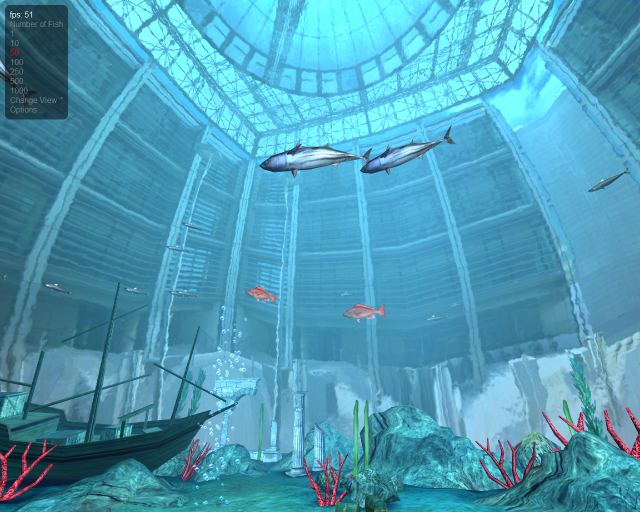
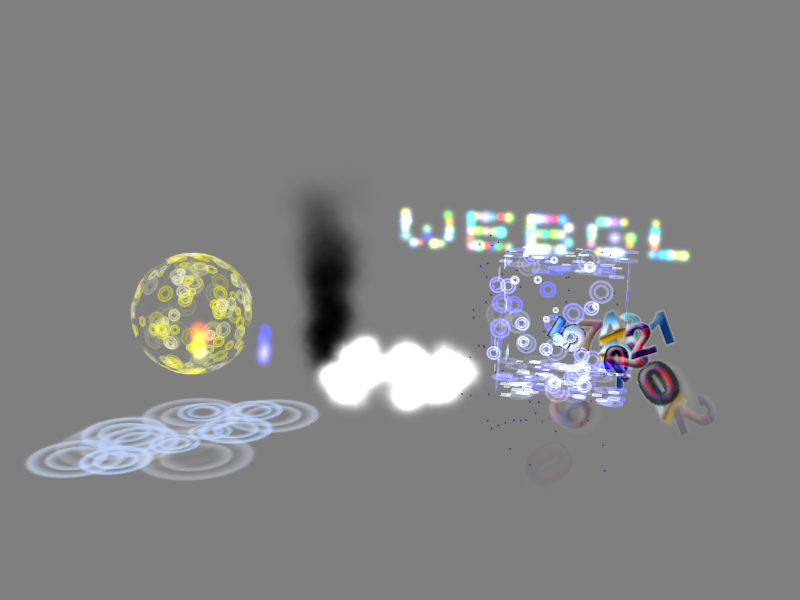
- WebGL brings 3D graphics to the HTML5 platform
- Plugin free: never lose a user because they are afraid to download and install something from the web
- Based on OpenGL ES 2.0: same for desktops, laptops, mobile devices, etc
- Secure: ensure no out of bounds or uninitialized memory accesses
- WebGL is an alternative rendering context for the HTML5 Canvas element
- WebGL = Javascript + Shaders
- Shaders - small programs that execute on the GPU - determine position of each triangle and color of each pixel
Introduction
Security
- Validate all input parameters/data in WebGL
- Never leak driver functionality that's not supported in the WebGL spec
- Out-of-bounds data access detection
- Initialize all allocated objects
- Deal with driver bugs
- Work around where possible
- Browsers actively maintain a blacklist
- Work with driver vendors to fix bugs
- Comprehensive conformance test suite
- Terminate long-running content (accidental or malicious)
Programming Model
- The GPU is a stream processor
- Vertex attributes: each point in 3D space has one or more streams of data associated with it
- Position, surface normal, color, texture coordinate, ...
- These streams of data flow through the vertex and fragment shaders
- Shaders are small, stateless programs which run on the GPU with a high degree of parallelism
Vertex Shader
- Vertex shader is applied to each vertex of each triangle
- Its primary goal is to output the location where the vertex should appear in the on-screen window
- May also output one or more additional values — varying variables — to the fragment shader
Vertex Shader -> Fragment Shader
- The outputs of vertex shader are the inputs of fragment shader, but not directly
- For each triangle, the GPU figures out which pixels on the screen are covered by the triangle
- At each pixel, GPU automatically blends outputs of the vertex shader based on where the pixel lies within the triangle

Fragment Shader
- GPU then runs the fragment shader on each of those pixels
- Fragment shader then determines the color of the pixel based on those inputs
Getting Data on to the GPU
- Vertex data is uploaded in to one or more buffer objects
- The vertex attributes in the vertex shader are bound to the data in these buffer objects
A Concrete Example
- Adapted from Giles Thomas' Learning WebGL Lesson 2
- Code is checked in to the webglsamples project under hello-webgl/
- May be viewed directly in a WebGL-enabled browser
- Goal of this example is to de-mystify WebGL by showing all of the steps necessary to draw a colored triangle on the screen
A Concrete Example
The Big Picture
<html><head>
<title>Hello, WebGL (adopted from Learning WebGL lesson 2)</title>
<script id="shader-fs" type="x-shader/x-fragment">
    ... // Vertex shader source code
</script>
<script id="shader-vs" type="x-shader/x-vertex">
    ... // Fragment shader source code
</script>
<script type="text/javascript">
    ... // WebGL source code
</script>
</head>
<body onload="webGLStart();">
    <canvas id="lesson02-canvas" style="border: none;" width="400" height="400"></canvas>
</body>
</html>
Vertex Shader
attribute vec3 positionAttr;
attribute vec4 colorAttr;

varying vec4 vColor;

void main(void) {
  gl_Position = vec4(positionAttr, 1.0);
  vColor = colorAttr;
}
- In this example, the vertex shader will only execute three times (for one triangle)
- In a typical application, thousands or tens of thousands of triangles are usually drawn together
Fragment Shader
precision mediump float;

varying vec4 vColor;
void main(void) {
  gl_FragColor = vColor;
}
- Value of vColor varying variable is a weighted combination of the colors specified at the three input vertices
- Based on the location of the pixel within the triangle, GPU automatically blends colors that were specified at each vertex
- Fragment shader executes between a dozen to tens of thousands of times, depending on how many pixels the triangle covers
Embedding Shaders
- Shaders in this example are embedded in the web page using script elements
- It is entirely up to the application how to manage the sources for its shaders
- Script tags were chosen to hold the shaders for this example for simplicity
- Real world application might download shaders using XMLHttpRequest, generate shaders in JavaScript, etc.
<script id="shader-vs" type="x-shader/x-vertex">
  attribute vec3 positionAttr;
  attribute vec4 colorAttr;
  ...
</script>
<script id="shader-fs" type="x-shader/x-fragment">
  precision mediump float;
  varying vec4 vColor;
  ...
</script>
Initializing WebGL
var gl = null;
try {
  gl = canvas.getContext("webgl");
  if (!gl)
    gl = canvas.getContext("experimental-webgl");
} catch (e) {}
if (!gl)
  alert("Could not initialise WebGL, sorry :-(");
- Not the best error detection logic; kept short for simplicity
- Consult WebGL samples for better examples
- Link to http://get.webgl.org/ if initialization fails
Loading a Shader
- Create the shader object – vertex or fragment
- Specify its source code
- Compile it
- Check whether compilation succeeded
- Complete code follows; some error checking elided
Loading a Shader
function getShader(gl, id) {
  var script = document.getElementById(id);
  var shader;
  if (script.type == "x-shader/x-vertex") {
    shader = gl.createShader(gl.VERTEX_SHADER);
  } else if (script.type == "x-shader/x-fragment") {
    shader = gl.createShader(gl.FRAGMENT_SHADER);
  }
  gl.shaderSource(shader, script.text);
  gl.compileShader(shader);
  if (!gl.getShaderParameter(shader, gl.COMPILE_STATUS)) {
    alert(gl.getShaderInfoLog(shader));
    return null;
  }

  return shader;
}
Loading a Program
- A program object combines the vertex and fragment shaders
- Load each shader separately
- Attach each to the program
- Link the program
- Check whether linking succeeded
- Prepare vertex attributes for later assignment
- Complete code follows
Loading a Program
var program;
function initShaders() {
  var vertexShader = getShader(gl, "shader-vs");
  var fragmentShader = getShader(gl, "shader-fs");
  program = gl.createProgram();
  gl.attachShader(program, vertexShader);
  gl.attachShader(program, fragmentShader);
  gl.linkProgram(program);
  if (!gl.getProgramParameter(program, gl.LINK_STATUS))
    alert("Could not initialise shaders");
  gl.useProgram(program);
  program.positionAttr = gl.getAttribLocation(program, "positionAttr");
  gl.enableVertexAttribArray(program.positionAttr);
  program.colorAttr = gl.getAttribLocation(program, "colorAttr");
  gl.enableVertexAttribArray(program.colorAttr);
}
Setting up Geometry
- Independent step from initialization of shaders and program; could just as easily be done before
- Allocate buffer object on the GPU
- Upload geometric data containing all vertex streams
- Many options: interleaved vs. non-interleaved data, using multiple buffer objects, etc.
- Generally, want to use as few buffer objects as possible; switching is expensive
- Complete code follows
Setting up Geometry
var buffer;
function initGeometry() {
  buffer = gl.createBuffer();
  gl.bindBuffer(gl.ARRAY_BUFFER, buffer);
  // Interleave vertex positions and colors
  var vertexData = [
    // X    Y     Z         R     G     B     A
    0.0,   0.8,  0.0,      1.0,  0.0,  0.0,  1.0,
    // X    Y     Z         R     G     B     A
    -0.8, -0.8,  0.0,      0.0,  1.0,  0.0,  1.0,
    // X    Y     Z         R     G     B     A
    0.8,  -0.8,  0.0,      0.0,  0.0,  1.0,  1.0
  ];
  gl.bufferData(gl.ARRAY_BUFFER,
    new Float32Array(vertexData), gl.STATIC_DRAW);
}
Drawing the Scene
- Ready to draw the scene at this point
- Clear the viewing area
- Set up vertex attribute streams
- Issue the draw call
- Complete code follows
Drawing the Scene
function drawScene() {
  gl.viewport(0, 0, gl.viewportWidth, gl.viewportHeight);
  gl.clear(gl.COLOR_BUFFER_BIT | gl.DEPTH_BUFFER_BIT);
  gl.bindBuffer(gl.ARRAY_BUFFER, buffer);
  // There are 7 floating-point values per vertex
  var stride = 7 * Float32Array.BYTES_PER_ELEMENT;
  // Set up position stream
  gl.vertexAttribPointer(program.positionAttr,
    3, gl.FLOAT, false, stride, 0);
  // Set up color stream
  gl.vertexAttribPointer(program.colorAttr,
    4, gl.FLOAT, false, stride,
    3 * Float32Array.BYTES_PER_ELEMENT);

  gl.drawArrays(gl.TRIANGLES, 0, 3);
}
Using Textures
Shaders Using a Texture
attribute vec3 positionAttr;
attribute vec2 texCoordAttr;
varying vec2 texCoord;
void main(void) {
  gl_Position = vec4(positionAttr, 1.0);
  texCoord = texCoordAttr;
}
precision mediump float;
uniform sampler2D tex;
varying vec2 texCoord;
void main(void) {
    gl_FragColor = texture2D(tex, texCoord);
}
Setting up Geometry with Texture Coords
var buffer;
function initGeometry() {
  buffer = gl.createBuffer();
  gl.bindBuffer(gl.ARRAY_BUFFER, buffer);
  // Interleave vertex positions and texture coordinates
  var vertexData = [
    // X    Y     Z         U     V
    0.0,   0.8,  0.0,      0.5,  1.0,
    // X    Y     Z         U     V
    -0.8, -0.8,  0.0,      0.0,  0.0,
    // X    Y     Z         U     V
    0.8,  -0.8,  0.0,      1.0,  0.0,
  ];
  gl.bufferData(gl.ARRAY_BUFFER,
    new Float32Array(vertexData), gl.STATIC_DRAW);
}
Setting up a Texture
- Create a texture object, and set up parameters
- Download an image from web and wait
- When an image is loaded, upload the image data to the texture
- Draw with the texture
Setting up a Texture
function loadTexture(src) {
    var texture = gl.createTexture();
    gl.bindTexture(gl.TEXTURE_2D, texture);
    gl.texParameteri(gl.TEXTURE_2D, gl.TEXTURE_MIN_FILTER, gl.LINEAR);
    gl.texParameteri(gl.TEXTURE_2D, gl.TEXTURE_MAG_FILTER, gl.LINEAR);

    var image = new Image();
    image.onload = function() {
        gl.bindTexture(gl.TEXTURE_2D, texture);
        gl.pixelStorei(gl.UNPACK_FLIP_Y_WEBGL, true);
        gl.texImage2D(gl.TEXTURE_2D, 0, gl.RGBA, gl.RGBA, gl.UNSIGNED_BYTE, image);
        drawScene();
    };
    image.src = src; // Start downloading the image by setting its source.
    return texture;
}
Draw with a Texture
function drawScene() {
    ... // Same as hello-webgl example

    // Bind the texture to texture unit 0
    gl.bindTexture(gl.TEXTURE_2D, texture);
    // Point the uniform sampler to texture unit 0
    // NOTE: you should fetch this uniform location once and cache it
    // Only written this way for simplicity
    var textureLoc = gl.getUniformLocation(program, "tex");
    gl.uniform1i(textureLoc, 0);

    gl.drawArrays(gl.TRIANGLES, 0, 3);
}
What Else?
- WebGL specific: handling context lost and recovery
- Regular graphics stuff:
- Matrix: projection, transformation, ...
- Lighting
- Animation
- Interaction
- ...

Higher-Level Libraries
- Now that we've dragged you through a complete example...
- Many libraries already exist to make it easier to use WebGL
- A few suggestions:
- Three.js (used in the Rome demo, mr. doob's demos, and more)
- CubicVR (used in Mozilla's WebGL demos such as No Comply)
- TDL (used in the WebGL Aquarium and most of the other webglsamples demos)
- CopperLicht (same developer as Irrlicht)
- PhiloGL (focus on data visualization)
- GLGE (used for early prototypes of Google Body)
- SceneJS (unique and interesting declarative syntax)
- SpiderGL (lots of interesting visual effects)
Break
Achieving High Performance
- "Big rule" associated with OpenGL programs:
- Reduce the number of draw calls per frame
- OpenGL's efficiency comes from sending large amounts of geometry to the GPU with very little overhead
- Sending down small batches — or worse, one or two triangles per draw call — does not give the GPU opportunity to optimize
- Reduce the number of draw calls per frame
- In order to draw many triangles at ones, it's usually necessary to sort objects in the scene by rendering state
- For example, draw all objects using the same texture at once
State Sorting
- Objects should be sorted and drawn according to the following criteria, in decreasing order of importance:
- Target framebuffer or context state
- Blending, clipping, depth test, etc.
- Program, buffer, or texture
- Switching these often requires a pipeline flush
- Uniforms and samplers
- Switching these is relatively cheap, modulo JavaScript overhead
- Target framebuffer or context state
State Sorting
- If possible, sort scene ahead of time, maintain as a sorted list
- Walking the object hierarchy and re-sorting each frame can cancel gains from batching
- Generate content (models, etc.) so that they can be easily batched
- Merge buffers
- Use texture atlases
- ...
Example Structure of Drawing a Frame
gl.enable(gl.DEPTH_TEST);
gl.depthMask(true);
gl.disable(gl.BLEND);
// Draw opaque content
gl.depthMask(false);
gl.enable(gl.BLEND);
// Draw translucent content
gl.disable(gl.DEPTH_TEST);
// Draw UI
JavaScript Performance
- JavaScript performance has improved dramatically over the past several years
- In particular, for 3D graphics use cases
- Already possible to generate many vertices from JavaScript every frame and send them to the graphics card
- NVIDIA vertex buffer object demo generates and uploads ~10 million vertices per second
WebGL Performance
- Still, in WebGL, all of the OpenGL "big rules" apply, along with another one:
- Offload as much JavaScript to the GPU as possible, within reason
- Often, the GPU can be used to rephrase a computation that would otherwise need to be done on the CPU
- Doing so can achieve not only better parallelism but also better performance
- The following examples show how this rule was applied in some real-world scenarios
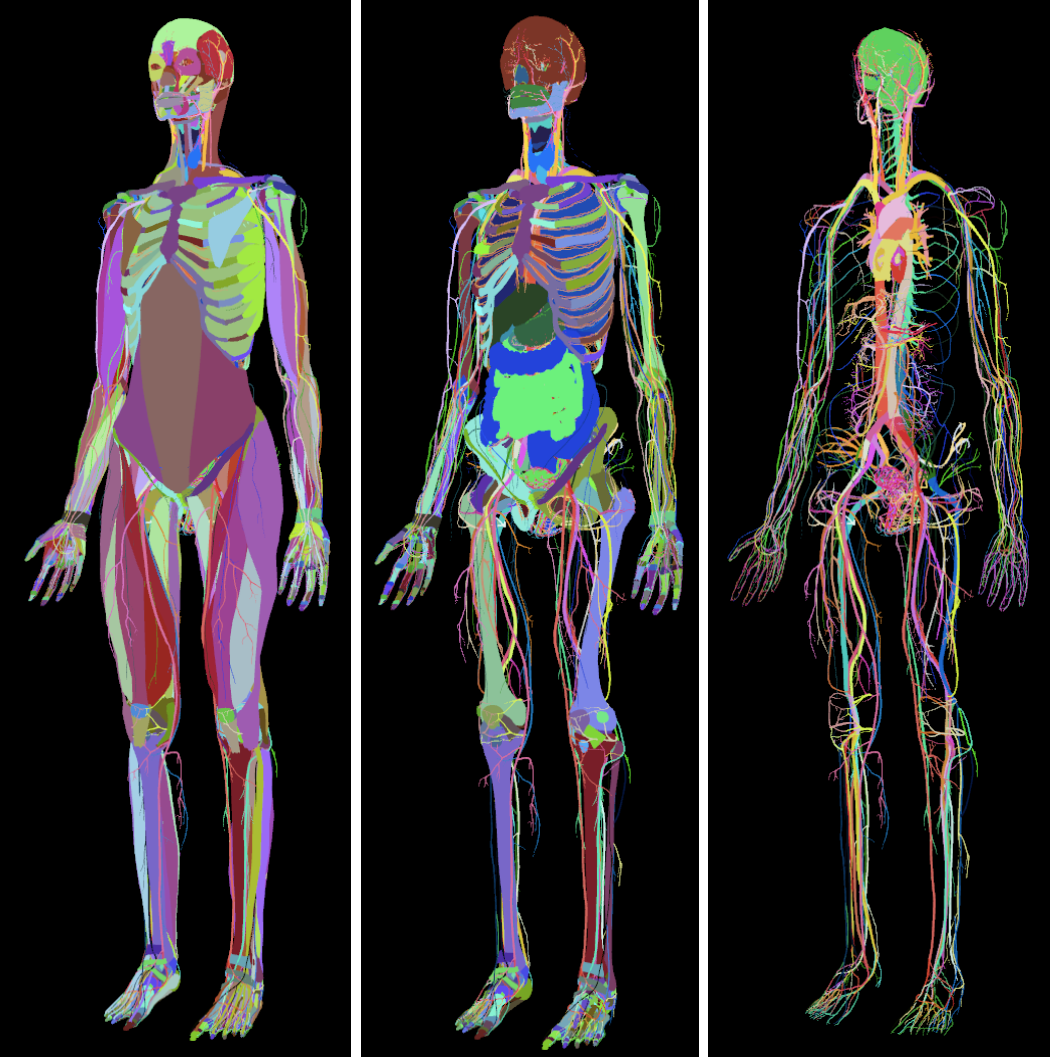
Picking in Google Body
- Google Body is a browser for the human anatomy
- Originally developed at Google Labs, it is now available as Zygote Body, from the company which developed the 3D models
- Models in application are highly detailed — over a million triangles — yet selection is very fast
- Click any body part to highlight it and see its name
Picking in Google Body
- How to implement picking?
- Could consider doing ray-casting in JavaScript
- Attempt to do quick discards if ray doesn't intersect bounding box
- Still a lot of math to do in JavaScript
Picking in Google Body
- Instead, Google Body uses the GPU to implement picking
- When model is loaded, assign different color to each organ
- Upon mouse click:
- Render body offscreen with different set of shaders
- Use threshold to determine whether to draw translucent layers
- Read back color of pixel under mouse pointer
- Same technique works at different levels of granularity
- Each triangle, rather than each object, could be assigned a different color to achieve finer detail when picking
Picking in Google Body

Picking in Google Body
- Note that this technique uses the GPU for what it's best at: rendering
- Essentially converts problem of picking into one of rendering
- Despite readback from GPU to CPU at end of algorithm, performance gains are worth it
Particle Systems
- Particle systems are a technique commonly used to draw graphical effects like explosions, smoke, clouds, and dust
- Most obvious way to implement a particle system:
- Compute positions of particles on the CPU
- Upload the vertices to the GPU
- Draw them in a single draw call
- This technique can work for small particle systems, but does not scale well because many vertices are uploaded to the GPU each frame
- Additionally, mathematical operations are not yet as fast in JavaScript as they are in C or C++
- A different technique is desired
Particle Systems
- Gregg Tavares has developed a particle system demonstration in the WebGL Demo Repository
- Animates roughly 2000 particles at 60 frames per second
- Does all animation math on the GPU

Particle Systems
- Each particle's motion is defined by an equation
- Initial position, velocity, acceleration, spin, lifetime
- Set up motion parameters when particle is created
- Send down one parameter — time — each frame
- Vertex shader evaluates equation of motion, moves particle
- Absolute minimum amount of JavaScript work done per frame
Particle Systems
- Jacob Seidelin's Worlds of WebGL demo shows a similar particle system technique
- Particles assemble to form various shapes, falling to the floor between scenes, animating smoothly between them
- Animation is done similarly to Gregg Tavares’ particle system
- For each scene, random positions for the particles are chosen at setup time
- Time parameter interpolates between two vertex attribute streams at any given time
- One stream contains the particle positions on the floor
- The other contains the particle positions for the current shape
- Once the current shape has been assembled, next interpolation target becomes the particles on the floor again
- JavaScript does almost no computation
Sprite Engines
- In early 2011, Facebook released JSGameBench sprite engine benchmark
- "Sprites" terminology more commonly used when authoring certain kinds of 2D games; similar to particle system
- Compared various techniques for rendering animated sprites within a web browser
- CSS-transformed Images
- 2D Canvas
- WebGL
- JSGameBench doesn’t appear to be under active development any more, but some lessons can be learned about its structure and performance characteristics
Sprite Engines
- At the time JSGameBench was released, several inefficiencies were identified in its WebGL backend
- Did one draw call per sprite
- Set three uniform variables per sprite, including position
- On average, bound one texture per sprite
- Seemed that drawing the entire sprite field with one draw call would be a big performance win
- Built prototype sprite engine to test this hypothesis
Alpha Blending and Draw Order
- Might seem impossible, because sprites require alpha blending and must be drawn in a particular order
- Little known fact: OpenGL's DrawArrays and DrawElements guarantee triangles are drawn in order
- Apparently GPUs contain quite a bit of silicon in the Render Output Unit (ROP) to provide this guarantee
- Thanks to Nat Duca of Google for this information
Batching Sprites
- Only major remaining problem is avoiding the per-sprite texture bind
- Basic idea is to send all sprite sheets for the entire sprite field to the fragment shader, and have it choose which one to display for any given sprite
- Slight generalization of texture atlasing
Sprite Animation
- Vertex shader does three major operations
- Selects the animation frame for the sprite from the sprite sheet
- Computes texture coordinates for the corner of the sprite
- Transforms the corner of the sprite according to its position and rotation
- (In JSGameBench the rotation is constant, so it is in this prototype as well)
- Majority of the information needed to do these computations is constant per sprite
- Computed and uploaded to the graphics card once, upon sprite creation
Sprite Transformation and Animation
- Position of each sprite is computed in JavaScript and uploaded to the graphics card each frame as another vertex attribute
- Technically possible to do this work in the vertex shader as well
- Doing it on the CPU more closely matches the structure of the JSGameBench code
- Also makes it simpler to handle wrapping at the edges of the screen
- "Global" frame offset is computed on the CPU each frame and sent to the shader program in a uniform variable
- Vertex shader does simple arithmetic to choose the frame of the current sprite's animation
Choosing a Sprite Sheet
- Fragment shader is extremely simple; it just samples the sprite sheet at the given texture coordinates
- Remember that in order to batch all the sprites into a single draw call, we actually have to feed in multiple sprite sheets (textures)
- Some of the sprites' animations are so large that they take up an entire 2048x2048 texture
- How to choose which sprite sheet to sample?
Fragment Shader Indexing Expressions
- Conceptually, we would like to send down a uniform array of samplers
uniform sampler2D textures[4];
- Compute an index into this array
- OpenGL ES 2.0 shading language, and therefore WebGL, doesn't allow this kind of indexing operation in a fragment shader
- Only kind of indexing expression allowed is one involving constants and loop indices
First Fragment Shader Attempt
- First attempt at texture selection fragment shader:
gl_FragColor =
    (texture2D(u_texture0, v_texCoord) * v_textureWeights.x +
     texture2D(u_texture1, v_texCoord) * v_textureWeights.y +
     texture2D(u_texture2, v_texCoord) * v_textureWeights.z +
     texture2D(u_texture3, v_texCoord) * v_textureWeights.w);
- This worked, but unfortunately was slower than JSGameBench at the time
- About 66% of the performance
- Why?
Diagnosing Texture Bandwidth Saturation
- Experimented with taking out the "explosion" sprite
- Largest of all of the sprites
- 256x256, filling a 2048x2048 texture completely
- Selected sprites from remaining three sprite sheets
- Significantly faster
- Indicates texture bandwidth is saturated on the GPU
Alternative Formulation
- Talked with Nat Duca from Google
- He suggested to use a series of if-tests in the fragment shader
- My own experience had been that eliminating if-tests in shaders was always faster
- Nat indicated that if the branch will go the same way across large regions, it will work well
Revised Fragment Shader
  vec4 color;
  if (v_textureWeights.x > 0.0)
    color = texture2D(u_texture0, v_texCoord);
  else if (v_textureWeights.y > 0.0)
    color = texture2D(u_texture1, v_texCoord);
  else if (v_textureWeights.z > 0.0)
    color = texture2D(u_texture2, v_texCoord);
  else // v_textureWeights.w > 0.0
    color = texture2D(u_texture3, v_texCoord);
  gl_FragColor = color;
Measurements
- Measurements on laptop where prototype was developed indicate that it could draw 250% or more sprites at 30 FPS than JSGameBench's WebGL backend at the time
- JSGameBench subsequently added batching to their WebGL backend
- Full source code for prototype is available in webglsamples project under
sprites/; see also documentation
Physical Simulation
- WebGL supports floating-point textures as an extension
- Every texel can store one or more floating-point values
- Because GPU can operate on so much floating-point data at once, it is possible to perform advanced techniques in WebGL such as physical simulation
- Any iterative computation where each step relies only on nearby neighbors is a good candidate for moving to the GPU
Physical Simulation
- Evgeny Demidov has developed several demonstrations showing how to simulate waves, interference patterns, 2D fluid dynamics and other techniques in WebGL
- Evan Wallace has developed demonstrations utilizing floating-point textures to simulate interactive water in a pool and even do path tracing in WebGL
- Ricardo Cabello (mr.doob of Three.js) has developed a beautiful new stateful particle simulation using floating-point textures to represent the particles' states
Conclusion
- WebGL is an evolving specification and ecosystem
- We look forward to your participation in the community!
- WebGL landing page at the Khronos Group
- WebGL wiki
- WebGL specification (editor’s draft)
- WebGL developers’ mailing list (for discussing the use of WebGL)
- WebGL public mailing list (for discussing the specification)
Q&A
<Thank You!>